Thursday, 18 April 2013

Spring Gardening

Over Easter weekend I got out & had a chance to begin yard clean-up.

Full yard bags & green bin waiting to go out on garbage day

3 leaf piles [still] waiting to be picked up

first crocuses!

Only yellow crocus in the entire yard


Front garden cleared of leaves, cultivated, and anemone bulbs planted

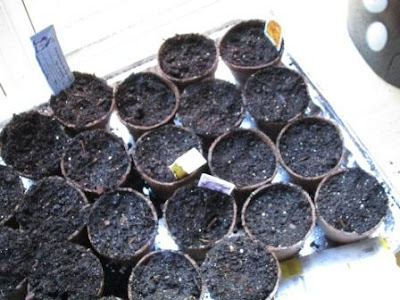
Seeds sown for an indoor start!


Then today, I finally got up the courage to plant my early spring flowers (because I saw a greenhouse up the mountain planting theirs!)

crocuses in the front bed

Blueberry bush in the front is newly planted, the larger one in back was already there. (I did plant the blueberry bush a couple of weeks ago.)

Planter by the front door!

Mums by the base of the front steps

Mums planted by existing bush near sidewalk

A front flower bed full of spring colour!


Seeds are sprouting!

Marigold on left (one of 13) and edible violet on right (the only one so far)

I love gardening - can't wait to get the veggie garden started!

Wednesday, 17 April 2013

Out with the Old!

In an earlier post about the refinished floors, I showed you another remodel we did -   minor one that I hinted at, and which was visible in the photos. Here's the close up of before & after!

Old chandelier - this photo makes it look almost glamorous. It was not.

New, beautiful pendant from Ikea! (Now for a new set of dining room table & chairs!)

Refinishing the Floors

We had a super-duper exciting Easter weekend this year.

1. I got outside and did some yard work (post coming soon) AND......

2. Ed refinished the floors in our dining & living areas:

Step 1: Remove vents (find dust)

Step 2: Remove corner-round trim (blurry action shot)

Step 3: Ensure that all items are removed from floors...(work in progress here)

Step 4: Stare at the worn-out, scarred floor for the very last time

Step 5: tape plastic over all large openings (note clean-ness of shop vac, and very large sander)

Step 6: Navigate crowded hallways while Ed sands

Step 7: Note that brand-new shop vac no longer looks new

Step 8: Clean (this is after 1/3 of a room)

Step 9: Clean cleaning rag....again (this is after only 2 swipes...!!!)

Step 10: Admire sanded floor

Step 11: Take picture of Ed cleaning walls, to prove to his mum that he has grown up (p.s. this is staged - after this picture, he quickly found something else to do... :P)

Step 12: Nearly done first clear coat!

Step 13: Enjoy the newly finished, beautiful floor! Ed also hung the new curtains.

More new floor - notice anything else new?


So proud of Ed for all the hard work he did - and REALLY enjoying our new floors. They look amazing!!!